Knowing how to secure Android device (assuming you have one) from attackers is extremely critical especially in today’s time when everything is managed from mobile devices, from booking an Uber to managing your Bank and Trading accounts or CryptoWallet. However unfortunately it always takes a back seat as you are busy with other high priority tasks.
No, this is not only about securing your mobile devices from Banking Malware, but also securing anything that gets connected with it, and yes failing to protect it may lead to compromise of your corporate laptop and eventually to your employer or organisation.
We have taken on the task to research and compile some easy steps which can help you quickly do a security and privacy audit on the go while you are reading this article. So if you are reading this article on your laptop, grab your handset, and if you are reading it on your handset, read on.
We also recommend you schedule a security audit for your Android devices at least once every six month and bookmark this page and revisit for updated and accurate information.
You may not have anything to hide, but you have a lot of things to protect
1. Validate your screen lock settings
Avoid using a pattern for screen lock; better go for pin or password options. Oh my god, you don’t use a pin? Don’t beat yourself and do it right away. Just go to
Settings > Lock screen
to configure or validate that. While fingerprint and face unlock are increasingly getting popular, be aware that they are considered less secure. A good idea will be to go for a strong password.
2. Update android version to the latest
Done with Step 1, great! Now do ahead and validate if your Android version is the latest. What! Did you push away that last update for like 2 months?
Ahm Ahm, bookmark this page, complete that update and continue reading to step 3 as the upcoming steps are critical and you may not see some of the options if your phone is not updated. You will get this option in
Settings> Software Update
Keep it in your mind, that there can be more than one update pending, so after each update make sure to go back to the software update option & click on “Download and Install” . It will also be a good idea to select the option of Auto Download.
3. Do a google security checkup
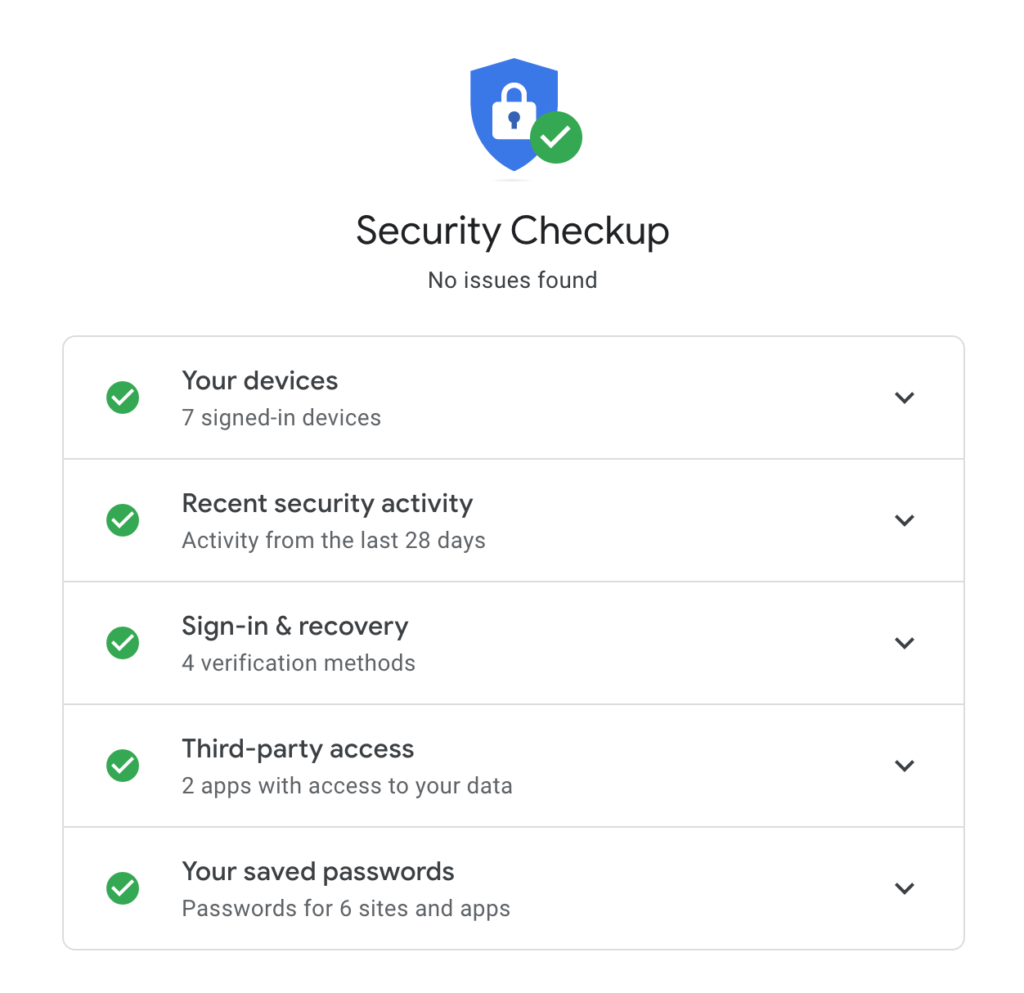
As you are done with step 1 and step 2, now is the time to do a Google Security Checkup. You can click over the link here to do that or find the option in your Setting in mobile device.
See if anything needs your attention. Is everything showing as green? no it doesn’t mean everything is good. Expand each of the options available and ensure that:
- Only trusted devices are shown in Signed-in devices. Remove if any of them is not in use

- Recent Security activities are familiar and inline to your usage
- Make sure that you have set the correct verification method and they are all updated
- Validate Third Party Access and Saved Passwords and move to the next step
- Take. a deep breath as we have made a significant process so far and go to the next step
4. Validate application permissions

Before that, please uninstall any apps that are not in use or even remotely seem suspicious like that game app that you installed last month and off-course the other one that you installed that night you were feeling naughty.
Now go to
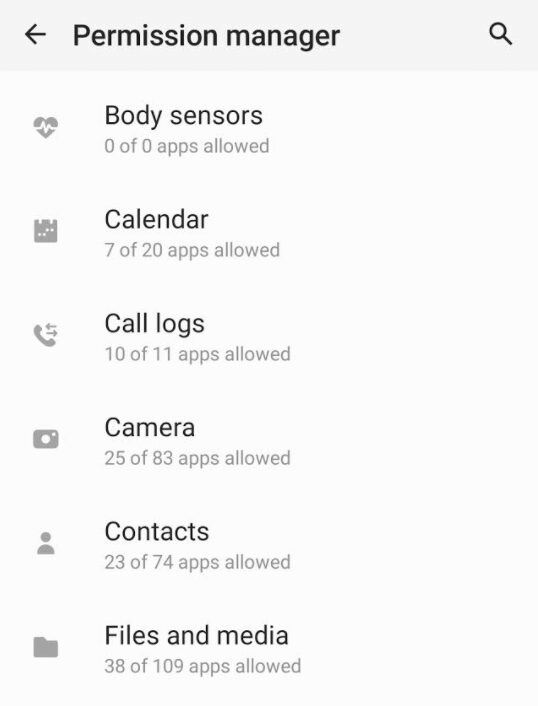
Settings> Privacy> Permission Manager
and deny any permissions to apps which you think are not required. Remember this is probably the most important step.
5. Enable google play protect
This is google intelligence checking your apps and devices for harmful behaviour. To do the configuration, go to
Settings>Biometrics and Security>Google Play Protect
Sorry it doesn’t protect you from the Big Daddy (aka Google) himself.
6. Enable two factor authentication
Yes, don’t be lazy and do it right away. Remember it’s not only to secure your android device but for your google account as well. You can use Google Authenticator or a third party app to do that. Please visit this link to do it before jumping to the next step.
7. Set “Find My Device” to be on
Google already has thought of additional controls and options in case you lose your device or just forget where you kept it. Go to
Settings> Others> Find My Device
and toggle it on. You will be able to get help from Google by visiting at this link
8. Enable chrome safe browsing mode
Chrome is the default android browser, and it comes with Safe Browsing mode enabled by default. There is also an Enhanced protection mode that can warn you about password breaches. You can set it up in
Chrome Settings>Privacy and Security> Safe Browsing
9. Turn off bluetooth and wifi when not used
If you are not using Bluetooth or Wifi, it’s always a good idea to turn them off. You can do it from:
Settings > Connections
Also avoid free or public wifi connections at they are unprotected and source of malicious attacks.
10. Get an antivirus solution
It will be a good idea to consider using an Antivirus solution to add an additional layer of protection to secure your Android device. Though it may cost a bit, the peace of mind that you get will be invaluable. There are actually a number of good Antivirus softwares available.
Congratulations you have successfully made your Android Device more secure assuming you did not skip any of the steps. Hold on, this is not all, please keep on reading if you want to strengthen your privacy settings.
Yes I can read your minds, privacy on Android? isn’t Google the Big Daddy of the Internet?
Well indeed it is, but with Android, Google passes back a significant amount of control. Of course, by default it’s configured at the most liberal privacy settings but by following this guide you can get your privacy back..well almost!
Here you go:
Congratulations you have successfully made your Android Device more secure assuming you did not skip any of the steps. Hold on, this is not all, please keep on reading if you want to strengthen your privacy settings.
You need to fight for your privacy or you’ll lose it!
Yes I can read your minds, privacy on Android? isn’t Google the Big Daddy of the Internet?
Well indeed it is, but with Android, Google passes back a significant amount of control. Of course, by default it’s configured at the most liberal privacy settings but by following this guide you can get your privacy back..well almost!
Ready to Secure your Android device further?Follow are the steps to help to get some of your privacy back:
1. Change your lock screen privacy settings
By default Android typically shows all it can even with a lockscreen. This means that if you received an OTP, anyone having visual access to your phone will be able to read it. To change the settings go to
Settings > Lock Screen> Notification
Make sure that the settings are set to “Icons only” and “Hide content” is toggled on.

2. Opt out of Samsung’s data stealing ecosystem
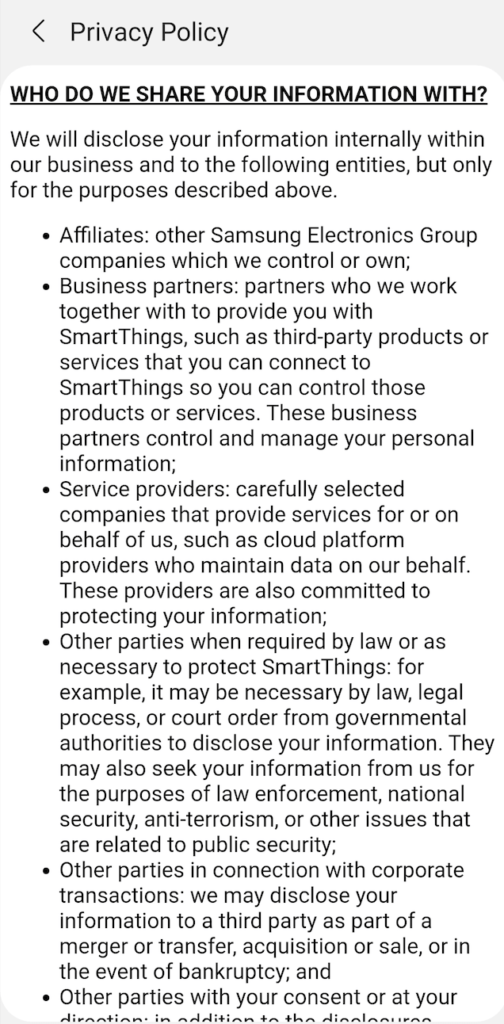
Do you use Samsung phone, well I was a big fan of their until I had a look at their privacy policies. Have a quick look at the image.
Dude this sucks, so Samsung can actually, or rather is actually selling all our personal information. All my life I thought Google was the Big Daddy.
We would recommend to uninstall all Samsung apps as soon as you can. To do this, long press over the application that you want to uninstall and then select “uninstall” option and repeat unless you are cleansed of the bloatware.
If you are using a different handset, please check and remove all the bloatwares from the Smartphone OEM.

3. Disable google ad personalization
Well I sincerely hope Google does not reduce my ranking for this, I mean seriously. Google as you are probably aware is the king of Internet Advertising. No matter what configuration you are going to do, you are going to see some ads. Ding Dong there are no free lunches and blah blah blah.
So if you are not in love with the personalised Ads, you can actually disable the personalisation system. To do that, go to
Settings > Google Services> Manage Your Google Account > Data and Personalization
Choose following options to reconfigure it:
In Activity Control
- Web and App Activity – This saves your activity on Google sites and apps. Toggle it to disable. If you do not want to disable it, please make sure Auto-delete is set to on and to minimal duration(3 months).
- Location History – tracks wherever you go irrespective of google maps being on or off. Toggle it to off or set it to Auto-delete for minimal duration.
- Youtube History – tracks whatever you watch on youtube. Set it as per your preferences, I choose to delete history after 3 months.
Wait we are not done yet, now click on your image on the top right side and repeat that for any other accounts that you may have.
4. Set Firefox as the default browser
While Chrome is an extremely capable and efficient web browser, we very well know that it’s always a trade-off with chrome between usability and privacy. So if you want to be more discreet around your browsing habits Mozilla’s Firefox for Android is a good bet for you.
5. Use a VPN for extra privacy
If you are cautious about the data being tracked during transit, especially when you use a public network, using a VPN is a good idea. A number of good VPN providers are available in the market including Express VPN, Nord VPN, Surf Shark and more.
I hope you have followed the steps along to secure your Android device.
One comment
Pingback: All about Stalkerware: Protection, detection, and removal | SecurityFocal